The ‘Organizer’ within Microsoft Project (Standard and Professional) allows one to quickly copy various Microsoft Project objects (fields, groups, filters, calendars, tables, modules, reports, and views) from one MS Project file or Enterprise Project schedule to another. In a Microsoft Project Server or Project Online environment, some users often build their own local MS Project elements (i.e. tables, fields, views, etc.) and want to share with other users.
Project Online/Server Administrators may also use the MS Project ‘Organizer’ to copy elements from various project schedules to the Enterprise Global Template.
To use the ‘MS Project Organizer’ to share elements between project schedules (or the Enterprise Global Template for Project Online/Server) open the project with the desired elements to be copied (shared) in Microsoft Project (either ‘Read-Only’ or ‘Read-Write’ mode). Open the project schedule to receive the desired elements, also in Microsoft Project.
Please note – the ‘receiving’ project schedule MUST be opened in ‘Read-Write’ mode in order to copy the elements to the project and save the changes.
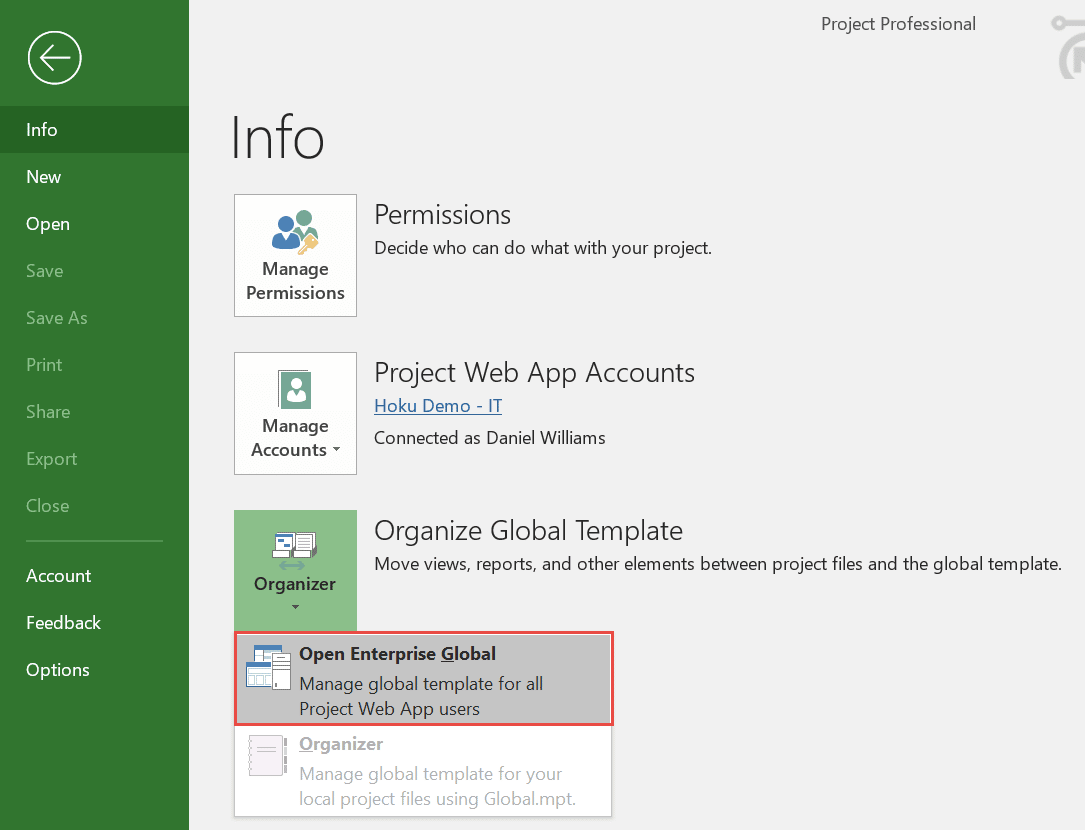
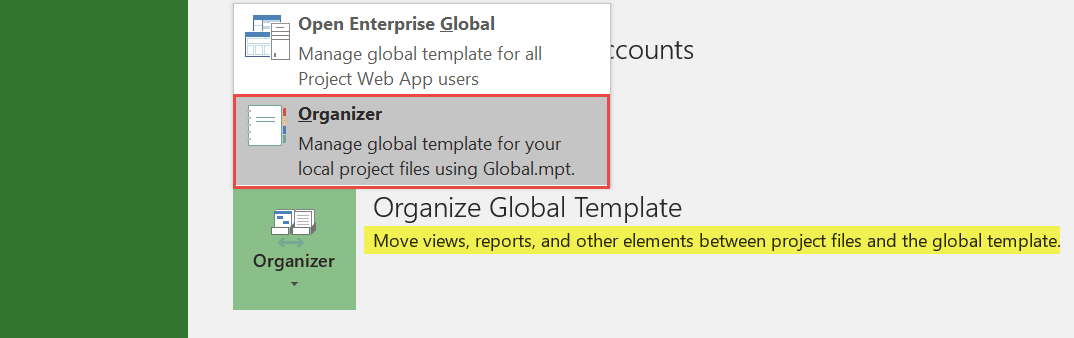
Open the MS Project ‘Organizer’ – Navigate to: File >> Info >> Organizer (‘Organize Global Template’ dropdown menu) >> ‘Organizer’
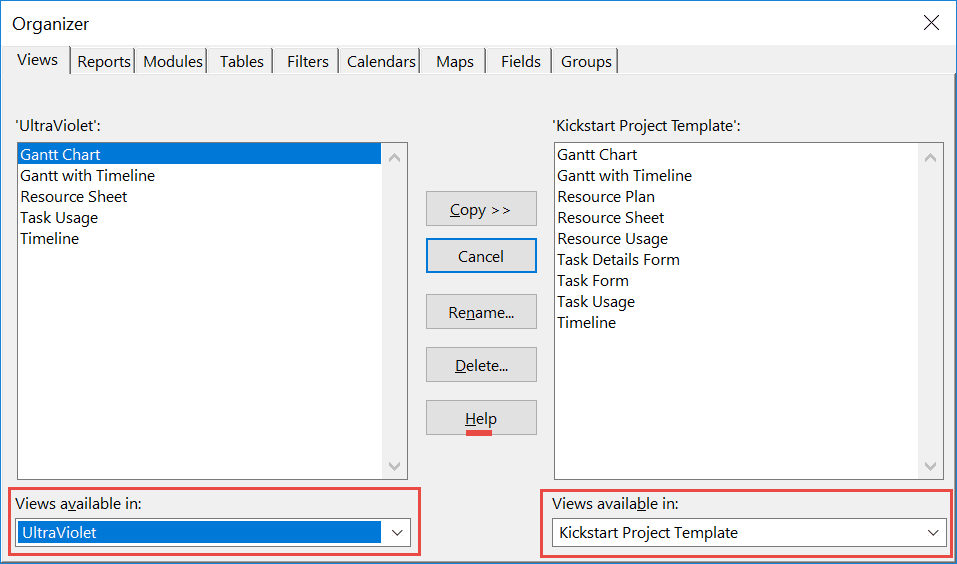
In the ‘Organizer’Dialogue Box, ensure the ‘sending’ project schedule is selected in one of the ‘… available in’ boxes (left or right), depending on the tab selected (i.e. ‘Views available in’, if the ‘Views’ tab is selected) and the ‘receiving’ project schedule (or Enterprise Global Template) is selected in the other.
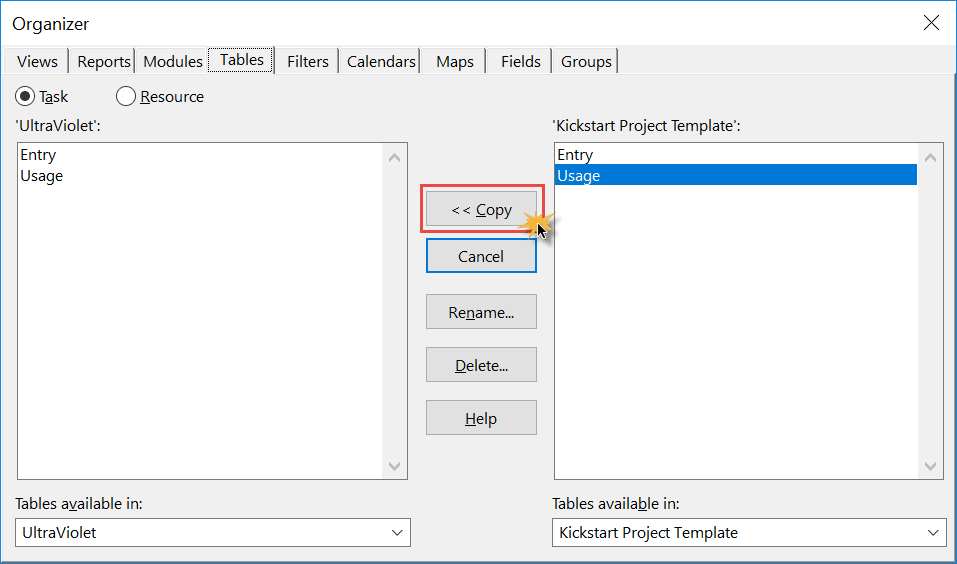
Copy desired elements. Select the tab associated with the element to be copied (i.e. if copying a table, select the ‘Tables’ tab). With the appropriate tab selected, select the element name (i.e. Table name) from the ‘sending’ schedule. Click the ‘Copy >>’ or ‘<< Copy’ button (depending on which project was selected first, to copy the selected element to the ‘receiving’ project.
The direction of the arrows in the ‘Copy’ button (i.e. >> (right) or << (left)) determines on which project is selected first from the ‘… available in:’ lists. The ‘sending’ project is selected first, which will direct the ‘Copy’ arrows to automatically point to the ‘receiving’ project.
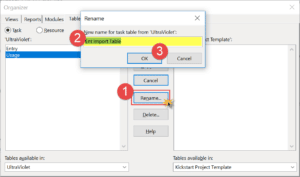
Rename the copied element by selecting the ‘copied’ element from the receiving project, then clicking the Rename… and entering a new name for the element (i.e. ‘Enteprise Import Table’). Click OK.
Renaming is OPTIONAL if you are not copying elements to the Enterprise Global Template; however, renaming is MANDATORY if you are copying elements to the Enterprise Global Template.
‘Copy’, ‘Rename’ & repeat for remaining elements. Select the tab associated with the remaining elements to be copied (i.e. if copying a table, select the ‘Tables’ tab). With the appropriate tab selected, select the element name (i.e. Table name) from the ‘sending’ schedule. Click the ‘Copy >>’ or ‘<< Copy’ button (depending on which project was selected first, to copy the selected element to the ‘receiving’ project.
OPTIONAL: Rename the copied element by selecting the ‘copied’ element from the receiving project, then clicking the Rename… and entering a new name for the element (i.e. ‘Enteprise Import Table’). Click OK.
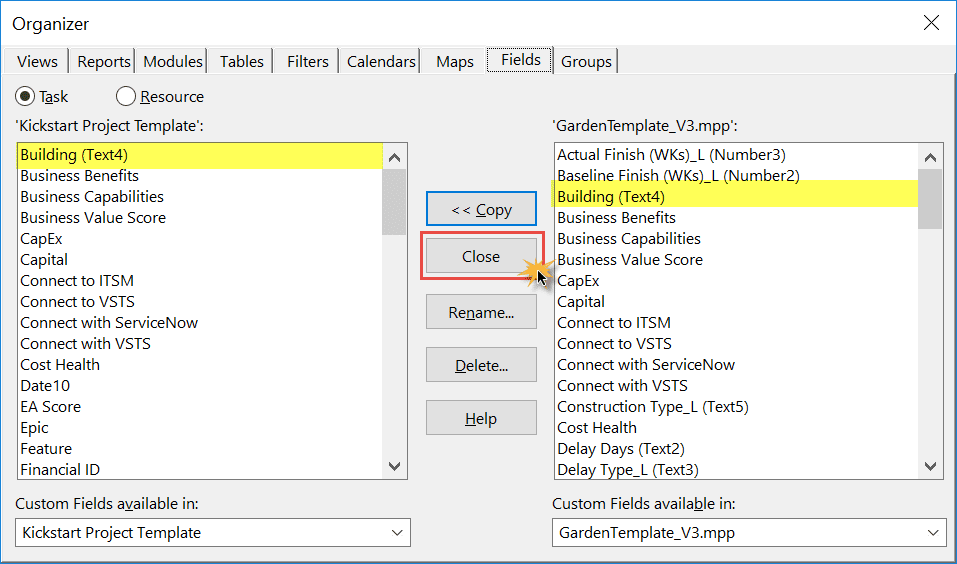
Close the ‘Organizer’ and Save your changes. After all of the desired elements have been copied, click Close, to close the ‘Organizer’ Dialogue Box. Test to ensure that the new elements are visible and available in the ‘receiving’ project. Save, close (and check-in, if an Enterprise Project) the ‘receiving’ project to save the latest changes. Close (without saving changes) the ‘sending’ project.